
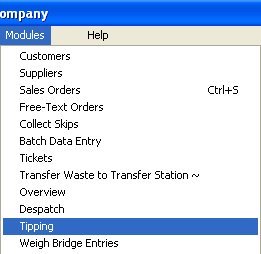
Tipping Charges
Tipping: |
Recording Waste Coming in to and Leaving the Yard. |
Details of all waste that comes in to or leaves the yard can be entered easily using this screen. At first glance this screen may look very daunting but is in fact quite simple. Before you can start recording waste movement in and out of the yard, you have to make sure that you have the following components in place:
- Waste Coming in to the Yard
- Customers. You have to define customers that will be using the Weighbridge service. more..
- Tipping Charges. Define all your different tipping charges / rates for different types of wastes. more..
- Waste Leaving the Yard

Before you can enter waste details, please make sure you have setup the relavent Customer (tipping waste into your yard) and Supplier (waste transfer stations that you take your waste to) details. Transfer Waste to Another Yard
Select the date, out or Both at the top of the screen. This will list all tickets for waste being transferred out since the selected date.
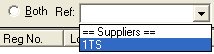
 If you wish, you can filter the list for a particular supplier by selecting it from the list.
 You can select whether the waste is to be recorded by weight (Kg) or by volume (cubic yards).
 You can now start entering the waste transfer details, below the ticket list area. You will note a single digit or character in front of the many data entry fields. You can 'jump' to any one of these fields by pressing the Alt and this key together.
Enter the lorry / vehicle weights and waste details.
0 Goods Out?. Tick this box for waste leaving the yard. As you change this option, the system automatically switches the printing template between waste coming into and leaving the yard.
You can now start entering the waste transfer details, below the ticket list area. You will note a single digit or character in front of the many data entry fields. You can 'jump' to any one of these fields by pressing the Alt and this key together.
Enter the lorry / vehicle weights and waste details.
0 Goods Out?. Tick this box for waste leaving the yard. As you change this option, the system automatically switches the printing template between waste coming into and leaving the yard.Date. Enter the date that the waste is being transferred.
1 Waste Volume / Nett Weight. If the option to record the waste by volume is selected, above then you can enter the volume of the waste being transferred in cubic yards. However if the weight is being entered by weight then this field will display the weight of the weight that has been calculated from the two lorry weights that are entered next.
1st Wt. This field is visible only when the waste is being recorded by weight. Enter the lorry first / laden weight.
2nd Wt. This field is visible only when the waste is being recorded by weight. Enter the lorry second / unladen weight. The system will automatically calculate the weight of the waste and display it in the Nett Weight field.
3 Cust. Select the customer (form waste coming into the yard) reference or the waste destination reference (for waste leaving the yard).
4 Lic. Enter the customer or waste producer registration number. If they are exempt, then you can click on the letter 'e' to its right.
5 L Reg. Select the lorry registration number that is being used to transport the waste.
6 C Reg. Carrier registration number.
7 Con. Enter the waste transfer consignment note number / reference.
8 EWC. Enter the European Waste Code for the waste being tipped. You can enter a single word for the type of waste to display a shortlist of codes matching the waste type. You can select the appropriate code to be entered into the next field, EWC.
9 EWC. Select the correct EWC waste code or use the previous field to look up the code.
G Haz. If the waste being tipped is hazardous, then select the appropriate one or more hazard codes.
J Phy Form. Select the physical form that the waste is in.
K Disposal. Select the mode of disposal code from the drop down list of Recovery and Disposal Codes.
M Location. Enter the location where the waste originated from.
O Tip Chrg. Select the tipping charge to be applied, based on the waste type.
Q Tiping. Enter the tipping charge amount.
V Document. Enter the documentation charge amount, if any.
Comments. Enter any relevant comments.
Prn. Select the appropriate printer that you wish to print to. This option is applicable only if you select a Report template. To the right of this option you can set the number of copies that should be printed.
Template. Select the appropriate template for waste comin in to or leaving the yard. There are 2 type of templates:
- *.lyt Layout templates. When a layout template is selected, then the output is sent to the printers defined in the printer configurations and NOT to the printer selected above.
- *.rpt Report templates. When a report template is selected, then the output is sent to the printer selected above.
Configuration Quick Links:
Configuration Overview | All System Configurations

Tabs:
Company | Global | Station Specific | Lists | Delivery Note | Collection Note | Map Books | Tool Bar | Inv
Sales Order / Billing Buttons | Pre-Defined Products | Skip Types | Waste Types | Tipping Charges
 |